
Organizations with strong inbound marketing initiatives spend a lot of time optimizing their website content.
However, some may be neglecting their image libraries. Unoptimized images can significantly slow down your site and turn away frustrated visitors. Here are 3 areas of optimization to evaluate with your web team.
1. Subject
Optimization on your website’s photos can begin before you even upload a file. If you’re going to spend time optimizing your photos, the first step is to make sure they’re worth optimizing.
Context
Evaluate the page and context in which the photo will be used to ensure your image is a good fit. Does the photo match the tone of the page? Does the context it’s displayed in make sense? Have you acquired the necessary photo release forms or licenses?
Websites are great communication tools and you should avoid crowding your pages with images that don’t add to the user experience (even if they look amazing!) A strong content strategy can help ensure your copy clearly communicates your message. Then you can create beautiful gallery pages to centralize any of your larger image collections.
Quality A collection of web image sins to avoid: low resolution, stock overlay, off-centered framing.
The function of the image is very important, but so is the form. A low-quality photo can distract users and won’t reflect the hard work you put into your website and organization.
Remove any watermarks or overlays from your photo and ensure it has an appropriately high resolution (we’ll cover image size in more detail below). If you’re working with photos of people, check to make sure no one got caught mid-blink or has any distracting wardrobe issue. A quick scan of the background for anything that could be “brand unsafe” such as offensive imagery is always a good idea especially for organizations using original images. Graphics should be geometrically aligned and the colors should match your site’s design.
2. Size
When discussing optimizing images on the internet, it’s important to remember that a; websites use image files such as .jpg, .gif, .png, tiff, and more to display many types of content like text, graphic elements, and photographs and b; though many file formats have been around for a while, new formats like Apple’s recent High-Efficiency Image File Format, .HEIC, are being developed and expanded on constantly.
The history and technology of image file formats is both interesting and exciting, but likely not very useful for a brief guide around optimizing images on your website. In the context of this article, neither the extension in the file name or the presence of text in the image changes the value of these tips.
Bonus tip: unless you have a specific reason to use a different file format, a .jpg should cover all of your non-transparency image needs.
Dimensions
There are most likely many types of images on your site such as icons, blog headers, and staff photos. Make sure the image dimensions are appropriate for their use cases -- don’t upload a 2000px wide image if your site’s design displays it only 300px. Many web vendors can be set up to create multiple versions of your images at different pixel dimensions and display the best fit depending on the page context -- smaller versions will be loaded on mobile while the larger sizes are reserved for desktop displays. Icons and UX elements can be served as a vector .svg file (as opposed to raster .jpgs or .pngs) and will display crisp and clean at any dimensions.
File Size
Text files are easily stored and compressed and generally make up the smaller portion of your website’s loading weight. Images are many times larger and are typically one of the main causes of slow site speed. Proper dimensions can help trim excess file size, but images can (and should) be optimized farther than the resizing and quality sliders in your image editor. A snapshot from a standard DSLR RAW photo will be around 20 megabytes each while in comparison, most website images shouldn’t be more than a few hundred kilobytes -- the average website loading size is between only 2-3mb, while Google recommends a loading speed of just 0.5mb. How then can we reduce our image’s file size?
There are two types of file size optimization for images: lossless and lossy.
Lossless optimization doesn’t touch the display information of the photo but instead increases the compression efficiency and strips out unnecessary metadata such as camera information and geo data. This will typically reduce file size in the 5-15% range. Many, if not most, images however are good candidates for the other method, lossy.
Lossy optimization will remove display data from your image such as unnecessary or repeated pixels and will alter the pixels of your image. This can result in huge file size savings (averaging around 75%) with minimal to no change in quality to the eye. You can reduce file size further by sacrificing more quality, however a light pass through a dedicated lossy optimization tool will be enough for significant benefits.
This kind of image optimization is different from the quality slider in a program such as Photoshop and requires special, but accessible programs. Tools like the mac-only ImageOptim and browser-based TinyPNG allow you to upload and optimize images with fine-tuned lossy quality and plugins for Wordpress like EWWW and command line tools are available as well.
3. SEO
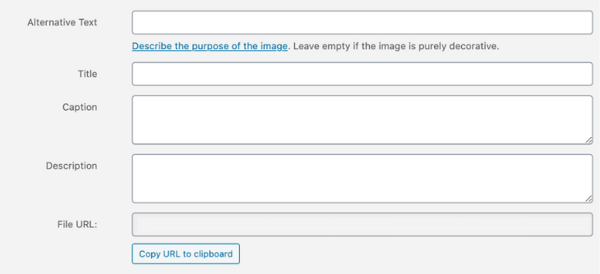 Wordpress' standard image tag editor.
Web images can help increase the effectiveness of your site’s SEO. An informative filename with keywords can help display your photo higher in search results and presents a polished image if users come across the file name. Ensure there are no “header-image-revision-2-final-(1)-FINAL.jpg” files popping up on your site!
Your image’s Alt Text and Title Tags are just as important, especially for making your site accessible to as many people as possible. Screen readers and other web assistant tools use the information in the alt text tag to translate the web for their users so every non-decorative image should have short, descriptive title and alt text
Optimizing your site’s images gets easier the sooner you start! Defining team or workflow processes that address the areas of subject, size, and SEO for all your images make it a breeze to get the most out of your marketing efforts. These checklist items are a good start, and working with a web developer, you can go even farther with caching and responsive loading development. If you face a full library of unoptimized images and could use a hand getting things under control, reach out and Tapp will be happy to help!